How to Remove Burnt Milk or Sugar From a Pan
As an Amazon Associate we earn from qualifying purchases. This page contains affiliate links — if you buy through them, we earn a small commission at no extra cost to you.
Burnt milk leaves behind a protein-based residue, a complex tangle of denatured proteins and Maillard reaction products that bond tightly to the pan’s surface. Burnt sugar, however, creates a different substance entirely: caramelised sucrose that can carbonise into a hard, glassy layer. These two residues require fundamentally different cleaning approaches, and getting it wrong means you’re fighting the wrong battle.
You’ve turned around to find your milk pan black while you were busy with something else. The smell hits you first—that sharp, scorched note that means the sugar in the milk has caramelised into a hard, dark layer that looks like it would take a miracle to shift.
It’s not a miracle you need. It’s the right approach for the right pan, in the right order.
Identify Your Pan Material First
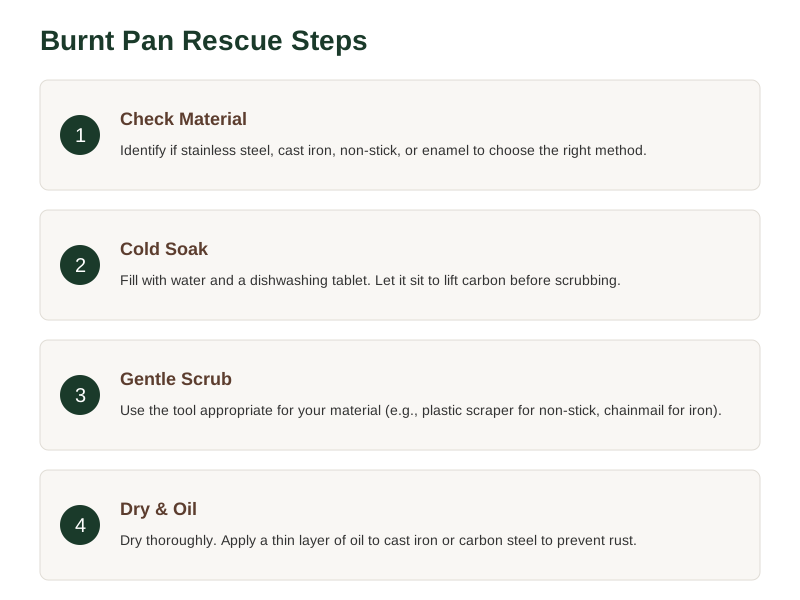
Before you reach for the scourer or the bicarbonate, stop and identify what your pan is made of. Burnt milk and sugar don’t behave the same way on every surface, and the method that rescues a stainless steel saucepan will wreck a non-stick or enamel one. The mistake people make is scrubbing first and thinking about material later.
📺 Watch: How to clean burnt milk pan in 10 minutes
The four categories that matter for this job:
- Stainless steel — tough, durable, can take real effort
- Cast iron or carbon steel — durable but prone to rust if soaked too long
- Non-stick — coating is easily scratched; needs a gentle touch
- Enamel — the glass-like surface is durable but abrasive cleaners can damage it
Aggressive scrubbing with metal wool or harsh powders is the fastest way to destroy a non-stick coating or scar an enamel surface. If you only remember one thing from this guide, let it be this: know your pan material before you touch it with anything abrasive. You can find deeper care guidance for cast iron and non-stick pans in our dedicated guides.
The Immediate Action: Cooling and Soaking
Here’s the step that matters most if you’ve caught the burn while it’s still hot or within a few minutes.
Fill the pan with cold water. This cools the pan quickly, stopping the residual heat from further cooking the residue. For a fresh burn, adding a small amount of washing-up liquid to the cold water can help start breaking down fats. Leave it to soak.
If the pan has already cooled and the layer has hardened, a warm soak with washing-up liquid can help loosen it—but it’ll take longer, and you may need to repeat it once before moving to the next step. Boiling water alone softens and lifts some of the residue, but for thick, carbonised layers it’s rarely enough on its own. Adding bicarbonate of soda (paid link)See on Amazon to the boiling water makes a meaningful difference—the alkaline action breaks down the carbon more effectively.
If you’ve got a badly scorched pan and want a step-by-step to work through, our burnt pan guide covers the full process for different scenarios.
Stainless Steel and Cast Iron Methods
For stainless steel and bare cast iron, you can move to more direct methods once the soak has done its work. These pans can take it.
Stainless steel responds well to Bar Keepers Friend—a powder cleaner that provides mild abrasion combined with chemical action. It is safe for stainless steel when used as directed. Sprinkle it onto the damp surface, leave it for a few minutes, then scrub with a non-abrasive scourer. The downsides are the smell and the occasional hazy residue, but it is effective. If you’d rather not buy a specialist cleaner, a paste of bicarbonate of soda with a little water works too—it won’t shift thick carbon as quickly, but it’ll do the job for moderate scorch. A plastic pan scraper (paid link)See on Amazon alongside the paste helps work it into the crevices of the base.
Cast iron needs a different approach because soaking it for extended periods promotes rust. Simmering water in the pan for a few minutes loosens the carbon; a chainmail scrubber then lifts it. Once you’ve scrubbed it clean, dry it immediately with a tea towel and apply a thin layer of oil while it’s still warm. That last step isn’t optional—leaving a wet cast iron pan to air-dry is how rust gets in. The ERGONOW Cast Iron Scrubber (paid link) and similar chainmail tools are comfortable to use and do the job well for routine cleaning, though heavily burnt-on carbon may need more than one session. For a budget alternative, a stiff non-metal brush and some patience works too. Avoid using Bar Keepers Friend on ordinary bare cast iron unless the product label specifically permits it.
Buy ERGONOW Cast Iron Scrubber on Amazon → (paid link)
Gentle Cleaning for Non-Stick and Enamel
These two need the gentlest approach, and the temptation to scrub hard is exactly the wrong instinct.
📺 Watch: BURNT MILK ? Quick Cleaning for burnt saucepans
Non-stick pans — the only tools you should be using are a plastic pan scraper and warm, soapy water. Metal scourers, steel wool, oven cleaner, and abrasive powders are all out. They will scratch or strip the coating, and once the non-stick surface is damaged, it’s not coming back. Bar Keepers Friend is not recommended for non-stick coatings. If the coating is already peeling, flaking, or noticeably worn, a new pan is the honest answer—fighting a pan that has genuinely had its coating compromised isn’t worth the effort. Coating that deteriorates after heavy use is not a cleaning problem, it’s a sign the pan is reaching the end of its useful life.
Enamel — Le Creuset, Staub, and similar enamel-coated cast iron—is more forgiving than non-stick, but still needs a careful hand. Use only a soft scourer and warm water with a little washing-up liquid. Avoid anything abrasive enough to scratch the enamel surface. Bar Keepers Friend is not recommended for enamel surfaces. If there’s stubborn burnt residue, soak it longer, not harder. Vinegar solutions are sometimes suggested for enamel, but a plain warm soak with detergent is the safer default—there’s enough variation in enamel quality that what works on one pan might not suit another.
Recognising Permanent Damage
There comes a point where the residue you’re looking at isn’t just burnt food—it’s permanent damage. Pitting in the base of a stainless pan, visible scratches that go deep, bubbling or flaking enamel, a non-stick coating that is actively peeling: these are signs the pan is finished.
The test is simple. If the surface itself is compromised—not just coated in burnt residue—no cleaning method is going to restore it. A pan with a pitted base will trap food every time you cook in it. A non-stick coating that’s lifting will continue to lift. The cost of spending an hour fighting a pan that’s past saving is better spent choosing a replacement.
If you’re not sure whether your pan has crossed that line, compare what you’re looking at to the surrounding surface. Burnt residue sits on top; damage is in the surface itself. If you can feel a rough texture or unevenness that wasn’t there before the burn, the pan is telling you something.
For more on when a pan has genuinely had it, see our guide to burnt and stuck-on pans .
Pan Material Guide
| Material | Best Method | Key Warning |
|---|---|---|
| Stainless Steel | Bar Keepers Friend or Bicarb paste | Avoid harsh abrasives that scratch surface |
| Cast Iron | Simmer water + chainmail scrubber | Never soak for long periods to prevent rust |
| Non-Stick | Plastic scraper + warm soapy water | Metal scourers will strip the coating |
| Enamel | Soft scourer + warm water | Avoid abrasive cleaners that can damage glass surface |
📺 Watch: How to Clean a Burnt Pan or Pot - The EASIEST Way
Your Next Steps
The pan you’re looking at right now is probably not as far gone as it looks. Burnt milk and sugar are surface problems in the vast majority of cases—unpleasant, but fixable with the right approach. To prevent burnt milk in the future, use a lower heat setting than you think you need. Milk and sugar-based liquids conduct heat differently to water—they catch and scorch much faster. Stir frequently, especially as the liquid approaches a simmer. Never leave a pan unattended, even for a couple of minutes. A heavy-based pan with good heat distribution helps too, because it’s less prone to hot spots that cause localised burning.
Work through the method for your pan’s material, be patient with the soak if the burn is heavy, and dry and oil cast iron immediately after cleaning. If the surface itself is damaged rather than just coated in residue, that’s the point to consider a replacement.
Now you know what to do—Download the Free Pan Rescue First-Steps Checklist and keep it somewhere useful for next time.
Related Guides
For a complete overview, see our How to Clean a Burnt Pan: Stainless Steel, Aluminium and Pots .
Sources & Further Reading
- How to Clean a Burnt Pan: easy Methods That Actually Work
- How To Clean Burned Milk from a Pot - Raising Memories
- How to clean a burnt pan | Bosch UK
As an Amazon Associate we earn from qualifying purchases. The products linked above are ones we think are worth a look.
Note: General guidance only, verify details with a qualified professional or official source.